
“Fast, Cheap, and Good: Choose any two.” This is an often-repeated joke in the engineering world that draws its source from the difficulties incumbent in balancing your time to market, your target price point, and the quality of the product itself. In truth, there are many factors that can affect how you choose to rank these drivers in your product development plan and focusing on only two of them at a time can result in a product that isn’t successful in the market. Companies are increasingly turning to workflow automation to try and balance these 3 objectives, but understanding when, where, and how to add automation to your workflow can make all the difference between automation helping or hindering your goals.
When to Implement Automation
First, it’s important to understand that the budget and schedule impact of incorporating automation in your workflow will almost always be directly proportional to when you first engage an automation partner or your internal automation team in your product development life cycle. Simplexity has successfully implemented assembly automation updates and inserted in-line and End-of-Line QC stations in a mature workflow or for a fully-defined product; however, inserting automation into your production plan during or after the start of production will generally require a higher degree of tool customization and potentially diminish the long-term cost benefit of the automation.
In a recent project, Simplexity was asked to automate a long established and manual process of removing liquid samples sealed in test tubes from packages sent to the processing lab through the mail. Because the distribution plan for these samples had already been designed and launched around the use of bubble mailer envelopes, significant time needed to be spent developing a completely unique tool to separate, orient, and cut open these packages that were different sizes and shapes and often deformed during handling. While the tool ultimately achieved the task of separating the test tubes from their packaging, the development cost and timeline were significant. In addition, the processing time required to complete an order was longer than anticipated and clearing particularly malformed packages still sometimes required user intervention. If the packaging of these shipments had been designed around a rigid cardstock box with a simple insert to position and orient the samples, a simpler tool made from mostly off-the-shelf components could have been designed in a shorter timeline
|
|
|
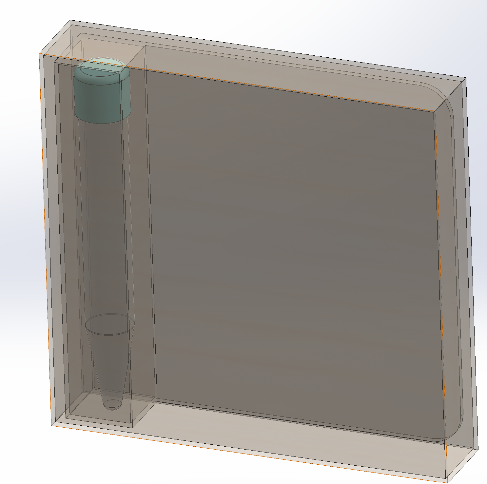

In contrast, on another project, Simplexity partnered with the designers of a consumable cartridge for a genetic sequencer early in the prototype phase of the product. The part was initially designed with a 0.7mm alignment feature that would need to be used on several assembly fixtures, in-line test stations, and end of line quality control tools. Working with the design team to increase the size of this feature to 6mm with a curved lead-in simplified the design of both manual and automated steps in the workflow without affecting the product function.
As demonstrated in the examples above, it’s important to consider how an automated assembly station or quality control tool can interact with the design of a product, its distribution plan, and its long-term goals . Consider hosting a cross disciplinary discussion that includes the automation planning team during the initial concept reviews. They may be able to provide important insight for updating non-functionally critical features to improve automated handling. Consider the following scenarios:
1. Say your product includes several large flat panels to enclose a frame. If those panels can be smooth surfaces, it will be easy for a vacuum chuck end effector on a robot to pick it up and install it on your frame, whereas a textured surface may be more difficult for an automated system to interact with. Say those panels need to be perforated to provide venting for the system and need to be stainless steel due to the environment they will be in.

Selecting a ferritic stainless steel will allow a cobot with an electromagnetic end effector to grab the tool easily, whereas a non-ferritic material may require the design of a custom gripper to hold the part.
2. Say you have a family of parts with multiple configurations. Adding the part number by itself may be sufficient for manual identification and assembly, but including a QR code version of the part number, visual datum features in the silk screen operation, and ensuring the mark is a high contrast color with the part, will make part number identification and orientation much easier in downstream automated assembly. The QR code could even act as an automatic link to the product manual for the end user, thus saving packing costs and reducing customer service traffic once launched.
Where to Implement Automation
We’ve shown a few examples of how designing your product with automation in mind from the beginning can provide significant benefits, but where to implement automation is also important to consider. While it may be tempting to try and automate every part of the process possible, automation equipment often represents a significant investment and depending on your target volumes and expected part lifetime, automating everything may hurt your bottom line in the long run. When considering where to add automation, there are a few categories that often rise to the surface as providing the best return on investment:
1. High repetition tasks: In a recent project, Simplexity was asked to help automate the process of uncapping a vial and extracting a liquid sample from the swab attached to the vial cap. The repetitive nature of the task meant each user could only perform this task a limited number of times before risk of repetitive motion injury. With the automated tool Simplexity designed, the team was able to handle significant fluctuations in volumes from 0 to 20,000+ samples a week while eliminating the logistical overhead of scheduling sufficient personnel. This simultaneously generated more consistent sample volumes.
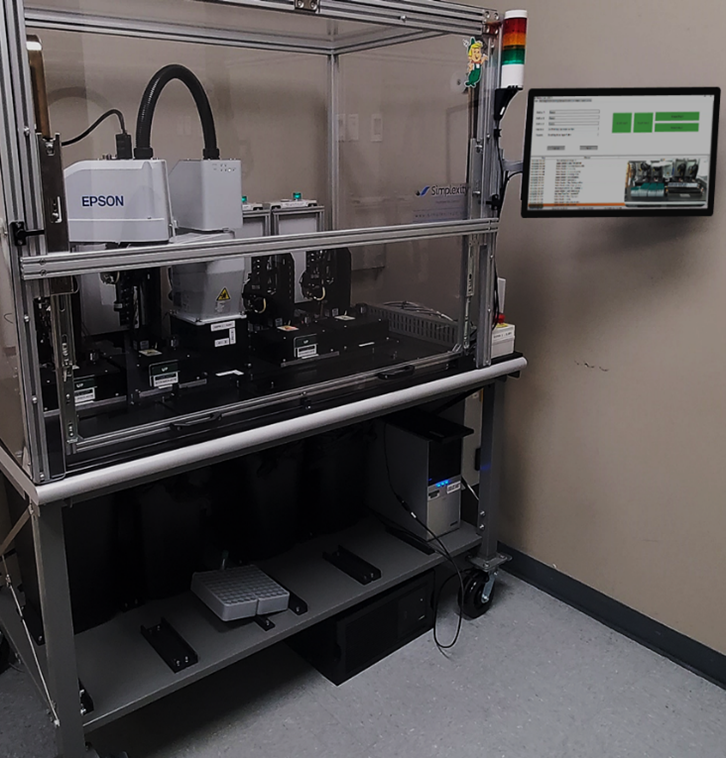 Figure 5: Simplexity designed automated sample extraction station, view 1
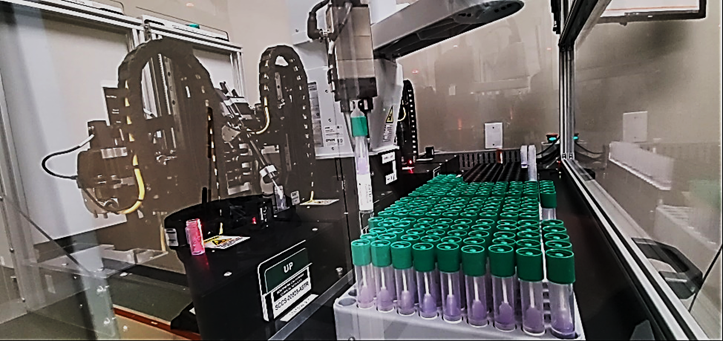 Figure 6: Simplexity designed automated sample extraction station, view 2
2. When you need to coordinate multiple events at the same time: A Simplexity client generated a complex microfluidics system that included rotary valves, pinch valves, and multiple access ports. They needed to verify the integrity of a fluidic circuit through all these embedded systems. To test this manually would have required a user to toggle multiple switches while monitoring mass flow and pressure decay results. Simplexity designed a single, end of line QC tool that automatically transitioned between 12 different tests that fully characterized the microfluidic circuits. The tool also provided important force and torque metrics on the moving valves to help the team track performance trends over multiple batches and production lines.
3. When traceability and serialization are needed: In many industries, products need to be serialized for traceability. Simplexity has worked with multiple clients to incorporate testing and serialization into one station. In one such example, Simplexity’s client needed an end-of-line test tool to verify the full function of a Covid-19 Virus Detector. The tool that Simplexity developed downloads the test results along with a unique serial number to both the client Manufacturing Execution System (MES) as well as the PCA of each unit.
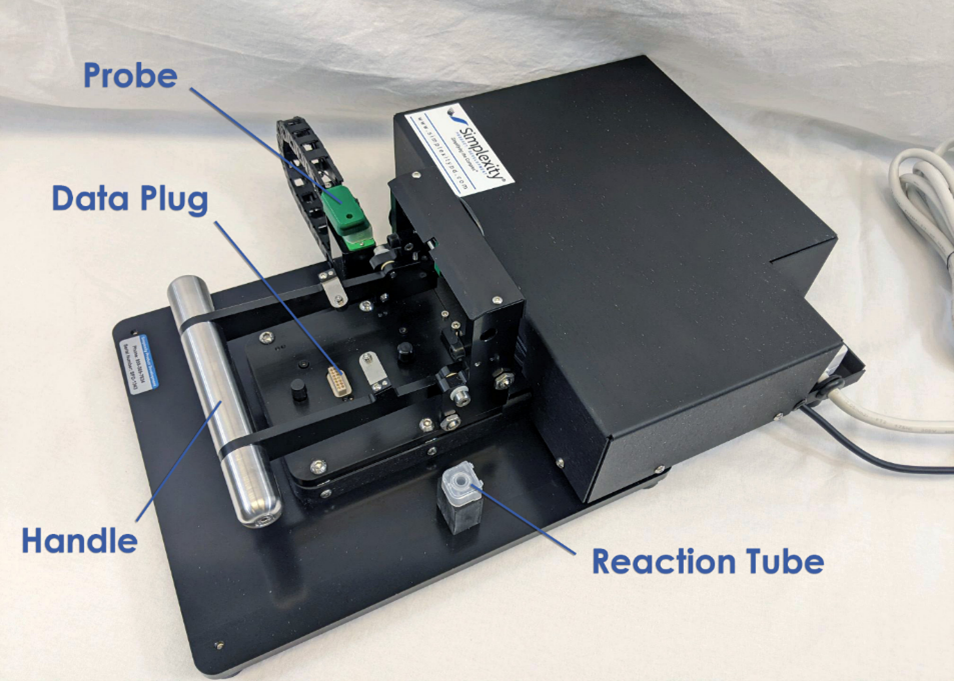
Figure 7: Simplexity designed Covid-19 Diagnostics EOL tool
4. High risk of user Error: In some cases, when going through a failure risk analysis of your workflow, you may highlight a concern that inhuman levels of accuracy or precision are needed. Or you may find that product requirement changes may have an unexpected effect on the rate of user errors in part of your procedure. In these cases, automation may be needed. In one such example, a client had the need to dispense fluids into a multi-well container before they are sealed with a heat activated film. After the production line was initially set up, the test team discovered that a higher-than-expected volume was needed for several of these fluids. An unintended consequence of this liquid volume increase was that users started reporting spills between the filling and sealing stations. Simplexity installed a cobot to carefully transport the critically filled system between the two stations while keeping it absolutely flat and controlling the move with inhuman levels of precision.
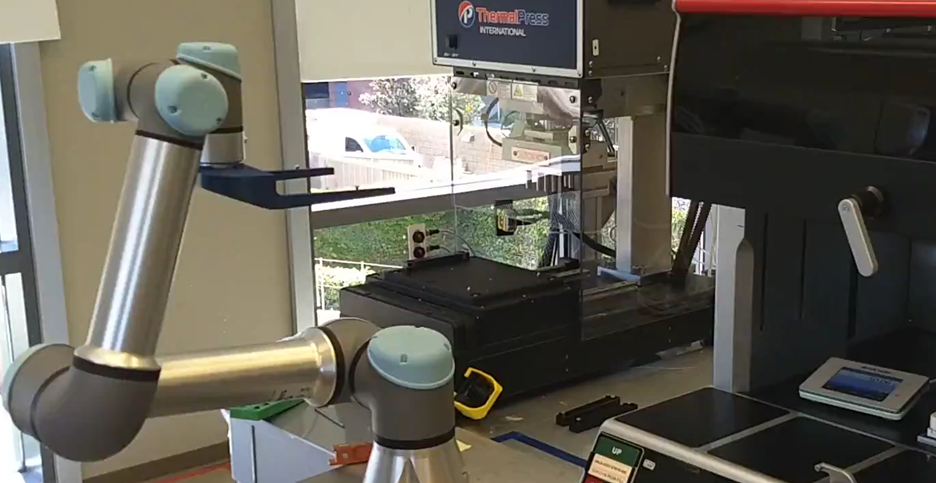
Figure 8: Cobot moving between filling and sealing station
How to Implement Automation:
Automation can help achieve the seemingly impossible balance of generating “fast, cheap and good” products when implemented correctly. Here are three steps to get you started on your automation journey:
1. Start by coordinating your product development plan with a trusted automation expert as early as you can. Walk through your objectives as a team including your marketing group, product design engineers, and production engineers to set the intent to design a product that is automation friendly from the start.
2. Look critically at the assembly, test, packaging and product support steps in your workflow. Highlight the areas with the most repetitive, complex, and precise steps.
3. Build an automation plan that matches your budget and timeline and ensures consistent product quality. Create digital mockups of the proposed automation steps that will allow the team to walk through the plan prior to full implementation and find possible gaps. For an example of how this can be done, read Creative Prototyping to Accelerate SCARA Robot Design.
Simplexity clients have seen a large return on their investment in optimizing their automation strategies. Re-designing features in parts that enable automation, ideally prior to tooling the parts, has allowed for a lower development cost of automation. Automating high-repetition tasks has resulted in a faster throughput with fewer operators needed. Robotic solutions provide more consistent results that lead to significant reductions in errors and an increase in quality. The biggest returns are realized the sooner that automation planning is started, so if you’re wondering when the best time would be to start, it’s probably right now!